 Studio RabbitOpen image enhancer
How to sharpen a blurry portrait with AI
Start with the largest original you have. Enhance it once, then zoom in on a feature with a clean edge, such as the upper eyelid. A crisp result can still change the person’s makeup, expression or skin texture.
Studio Rabbit ·One portrait before and after
In our original, look at the soft ends of the hair and the small heart above the eyebrow. Open either image for the full-size file.
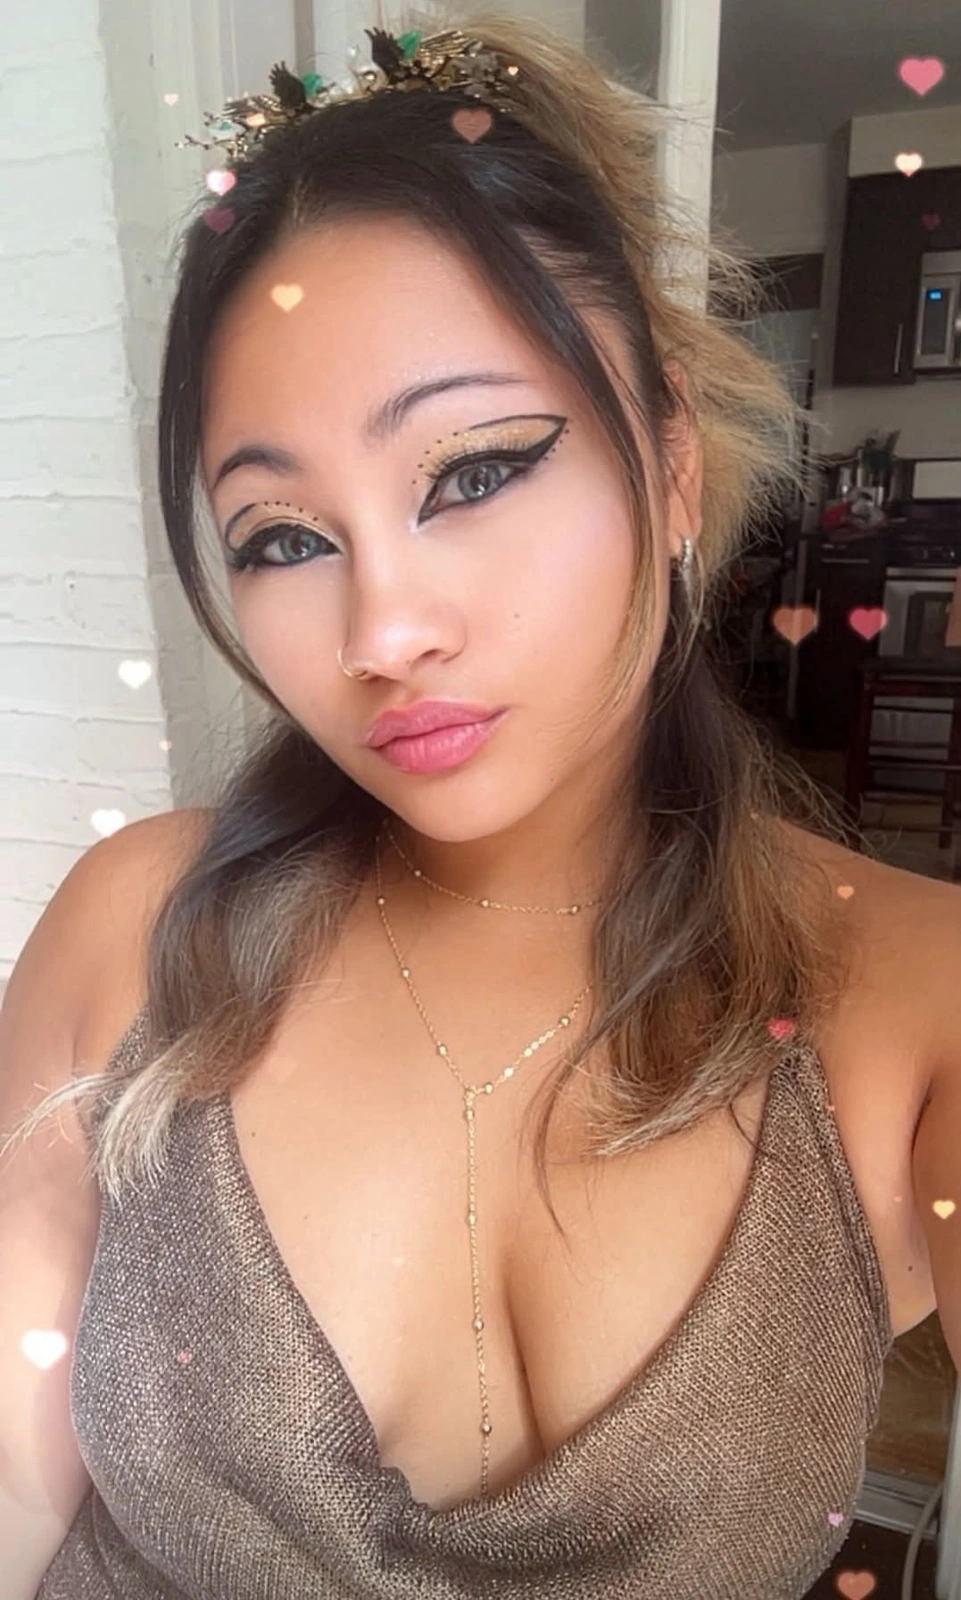
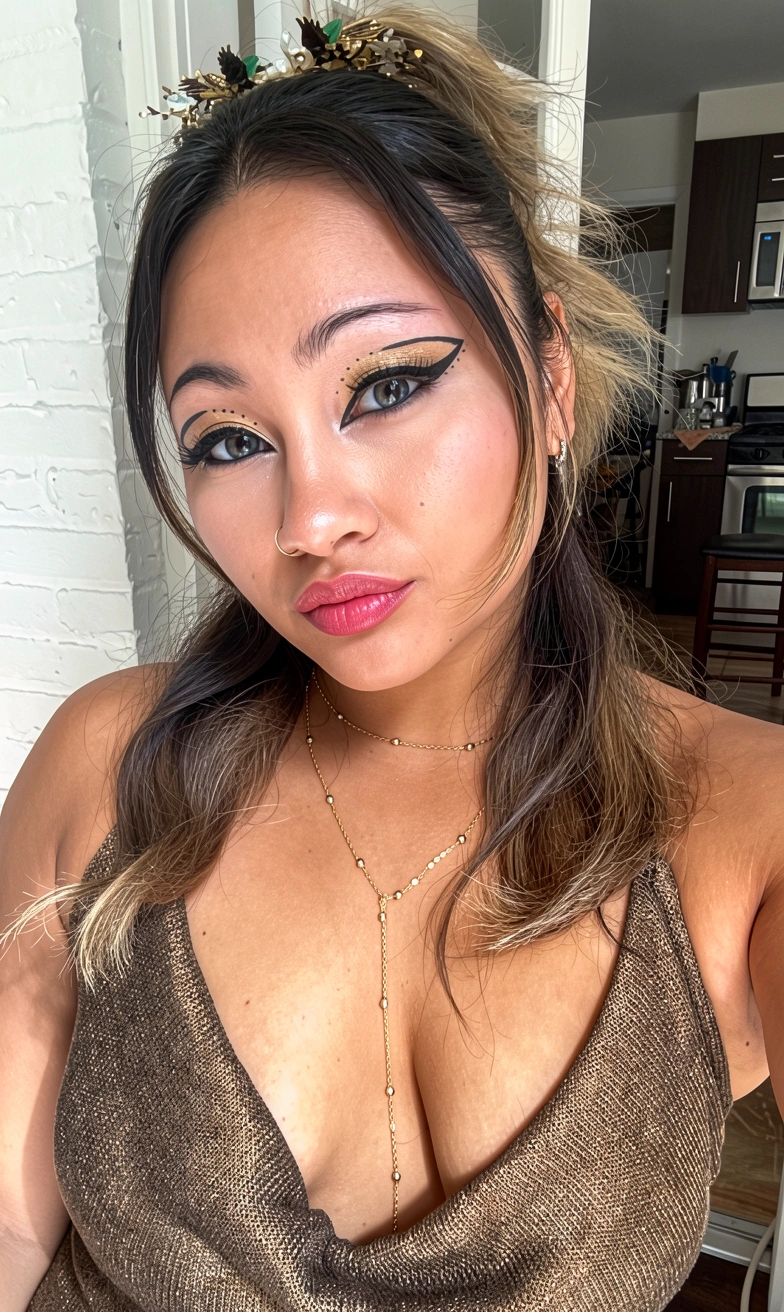
Zoom in on the eyeliner
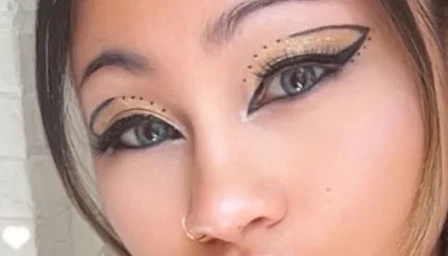
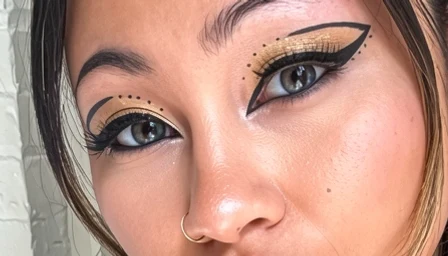
In the enhanced crop, the dark wing is easier to trace and the lower lashes stand out. The skin also has more texture. We can see the new edges, but the original is too soft to verify each lash. Further down the image, the enhancer also removed several decorative hearts. Keep the original if that detail matters.
Try it on your portrait
- Choose a clear photo of one adult that you have permission to edit. A camera original usually retains more detail than a screenshot sent through a chat app.
- Open Enhance, upload the portrait and check the credit cost. The studio supplies the enhancement prompt.
- Generate once and use the comparison slider. Look at the eyes, hairline, jewelry and background before downloading.
When sharpening helps
A slightly soft outline often becomes easier to read. If motion blur has smeared both eyes into streaks, another photo from the same moment is a better starting point. For a portrait that already looks sharp, inspect a small crop before spending credits on another pass.
See our same-portrait comparison with Cutout.pro or browse more editing examples.