 Studio RabbitOpen image editor
How to change clothes in a photo with AI and keep the same face
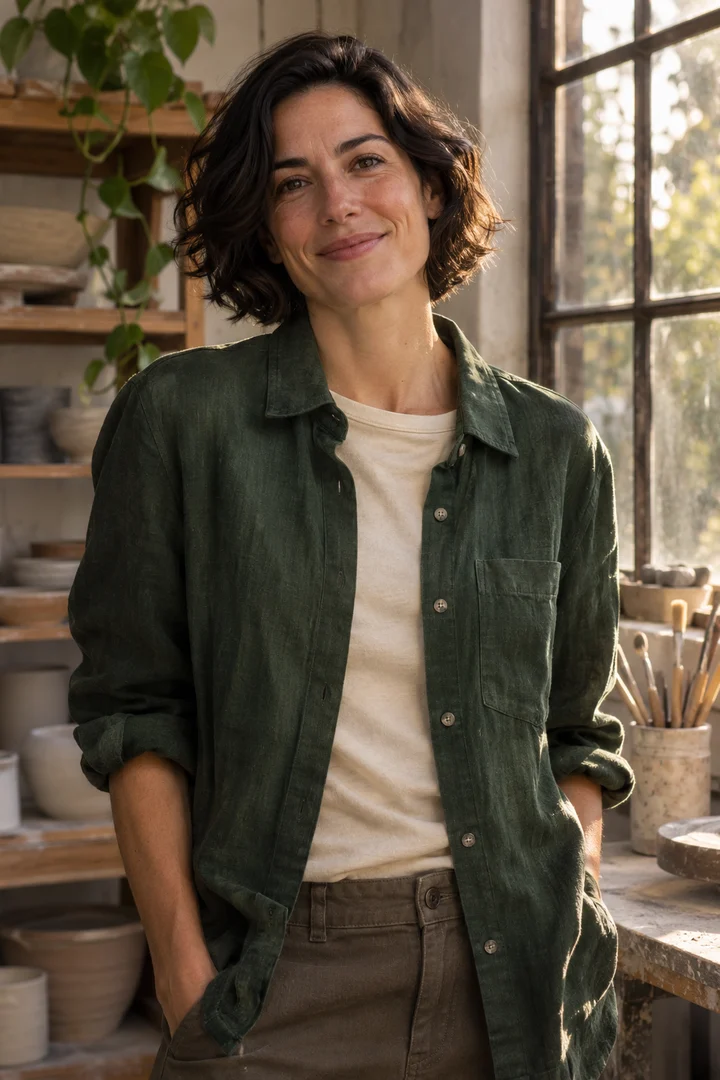
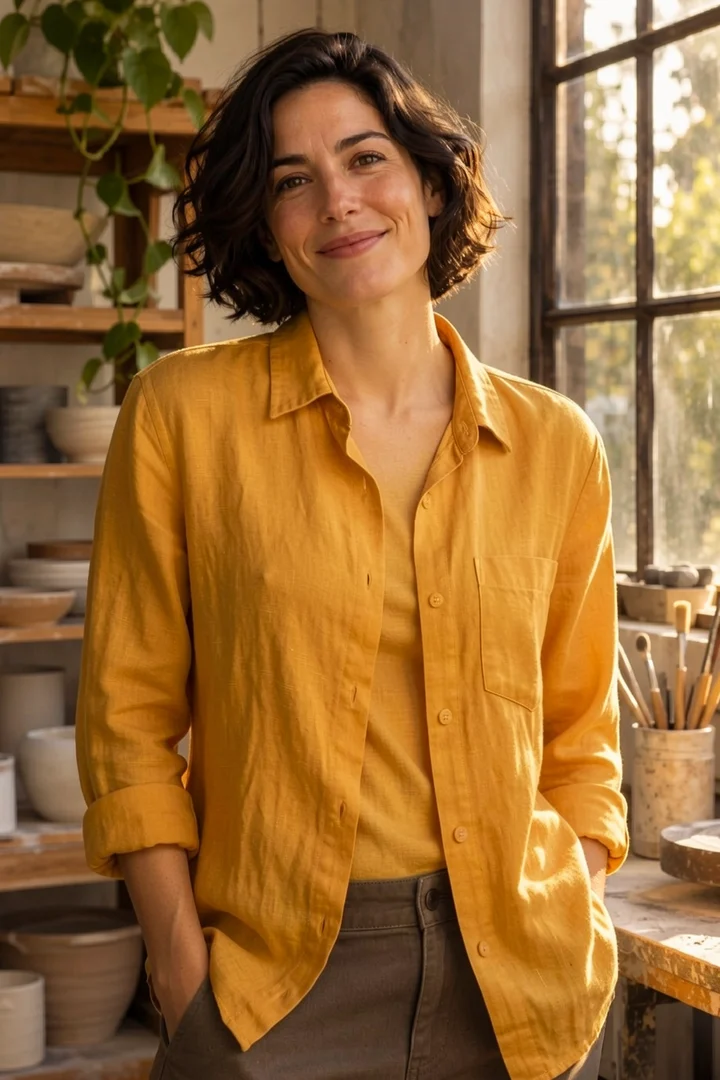
When you use an AI clothes changer, describe the garment you want to replace first. Then name the details that make the portrait yours. For our edit of Avery, a fictional ceramicist, that meant keeping her slight head tilt, her smile and the afternoon light from the studio window.
Studio Rabbit ·One portrait, two shirts
The exact prompt we used
Change the green overshirt and cream tee into a fully buttoned saffron yellow linen shirt with long sleeves. Keep Avery fully clothed. Keep the same face, hair, pose, studio background, light and framing.
Look at the collar. The cream tee is gone, and the yellow shirt has its own collar and row of buttons. Now compare the eyes, the tilt of Avery’s head and the window frame beside her. They look similar across the two images. The skin looks a little warmer in the edit, and the collar is still open at the neck despite “fully buttoned” in the prompt. These are the kinds of differences worth checking before you download.
Try it with your own photo
- Start with a clear portrait. Choose one adult whose photo you have permission to edit. A waist-up shot works well for a shirt change because you can see where the shoulders, cuffs and hem should fall.
- Describe the swap in Custom mode. Open Image Edit, upload the original and choose the custom prompt option. Name the existing garment, the replacement, its color and one detail you care about. “A navy wool cardigan with brass buttons” gives you a clearer result to judge than “make it stylish.”
- Say what should stay. If you like the expression and the light, say so. Keep a copy of the original, generate the edit, then compare the two photos at the same size.
A prompt you can adapt
Replace the [original garment] with a [color, fabric and garment]. Keep the subject’s facial features, expression, hair, pose, background and lighting consistent with the original photo.
What if the face or outfit changes too much?
If the face drifts, start the next attempt from the original portrait. Keep the request to one clothing change. Asking for a new camera angle or dramatic lighting at the same time makes it harder to tell whether the face changed or just looks different under the new light. A preservation prompt can guide the edit, but facial details can still shift.
If the face looks right and only the garment missed, describe the visible correction. For Avery, our next prompt would add “fasten the collar button at the throat.” For a sleeve that ends too high, try “both cuffs reach the wrists.”
For other kinds of changes, read how to edit photos with text. You can also see how Avery’s outfit becomes a scene in Character Studio.